
In the article “AI blogs independently about random topics: The rise of ChatGPT“, we showed how to generate blog posts with random topics using ChatGPT. However, to actually publish the post, a lot of copy-pasting and editing is still required. The good news is that with the OpenAI API (and in our case, the WordPress REST API), much of this can be automated and better structured.
An overview and documentation of the OpenAI API can be found here. To use the API, you also need an account with OpenAI. The API is generally paid and is billed based on tokens- but you can currently use a trial version to test it. OpenAI provides you with $18 for the test period for free. If you want to know what a prompt or response corresponds to in tokens, you can test that with the tokenizer tool.
Approach:
The workflow in our Python script looks something like this:
1. Generate a random topic for the post
This involves generating the random topic along with metadata using a suitable prompt. To ensure that the output is structured and repeatable for repeated requests, the output of ChatGPT should be in JSON format. We need the following information:
- Post title
- Focus keyphrase
- SEO title
- Meta description
- Image prompt for the post image
Additionally, we want to generate posts in English and German, so the above-mentioned content must be generated in both languages.
Finally, we need to write the JSON content to a file so that we can access it later. We will also add the number of tokens used for the request and reply to the file name.
2. Generate the content of the post
After the topic has been chosen by ChatGPT, we will generate a suitable prompt to generate the English-language content. Some readability criteria should be provided:
- Writing style
- Text length
- Paragraph length
- Maximum number of words per paragraph
- The focus keyphrase should be included in the introductory sentence
In addition, ChatGPT should insert HTML tags for subheadings and paragraphs.
This response from ChatGPT should also be written to a file along with the tokens used.
3. Translate the generated content
Once the English-language content has been generated, it must be translated into German by ChatGPT.
As usual, the translated text will be stored in a file along with the tokens used.
4. Generate the drafts with the WordPress REST API
To save ourselves a lot of work, we want to send the generated content directly to our blog if possible. This is possible with the WordPress REST API. You only need a user configured for this with at least author rights and a corresponding application password:
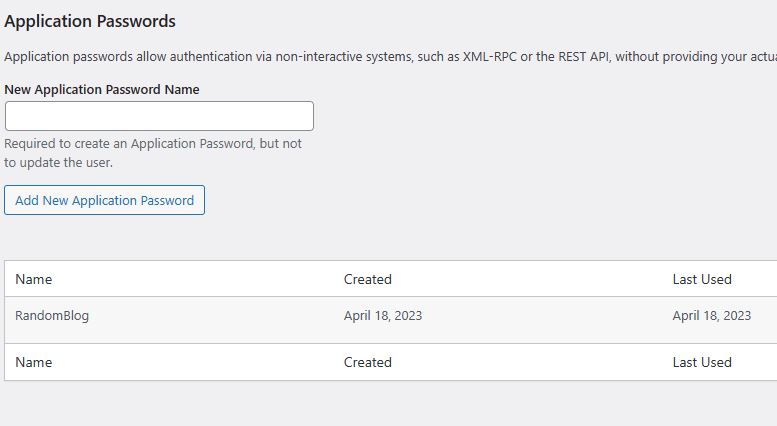
After that, you can send HTTP requests to your blog to read content or create posts. Here is the API documentation. But you can also let ChatGPT or Bing Chat generate the Python code for the requests – like I did.
5. Create a topic blacklist
It can happen that ChatGPT repeatedly generates content for already generated topics. For this reason, we want to create a blacklist of already generated topics that we can consider directly in step 1.
Preparing the prompts
In the first step, we want to implement some helper functions to generate the prompts.
import openai
import os
import json
import requests

openai.api_key = "<YOUR API KEY>"
openai.organization = "<YOUR ORGANISATION>"

def generate_text(prompt, system_hint):
    response = openai.ChatCompletion.create(
        model="gpt-3.5-turbo",
        messages=[
            {"role": "system", "content": system_hint},
            {"role": "user", "content": prompt},
        ]
    )

    return response

def get_topic_prompt(topic=None, blacklist=None):
    prompt = "Generate a "

    if topic is None:
         prompt += "random topic for a blog post "
    else:
         prompt += f"blog post for the topic ""{topic}"" "

    prompt += "in english and german. \
        Write an appropriate focus keyphrase with 4 words or less. \
        Write a short SEO title and a post title. \
        Write a prompt for an image creator. \
        Write a meta description with a maximum length of 156 characters."

    if not (blacklist is None):
        prompt += f" Do not use a topic from the following list: {blacklist}. "

    prompt += "Use the following json format as output: \
        { \
        \"focus_keyphrase_english\": \"\", \
        \"seo_title_english\": \"\", \
        \"post_title_english\": \"\", \
        \"image_prompt_english\": \"\", \
        \"meta_description_english\": \"\", \
        \"focus_keyphrase_german\": \"\", \
        \"seo_title_german\": \"\", \
        \"post_title_german\": \"\", \
        \"meta_description_german\": \"\" \
        }"

    system_hint = "You are a helpful assistant that writes blog posts."

    return prompt, system_hint

def get_content_prompt(topic):
    prompt = f"Write a journalistic blog post on the following topic: \
        {topic} \
        Leave out the title and begin with an introduction. Use appropriate subtitles. \
        Use html tags for subtitles and paragraphs. \
        The focus keyphrase should appear in the introduction. \
        A paragraph should not be longer than 200 words. \
        No more than 25 percent of the sentences should have more than 20 words. \
        The post should contain a maximum of 10 percent passive sentences. \
        The post should contain at least 600 words and have enough transition words."

    system_hint = "You are a helpful assistant that writes blog posts."

    return prompt, system_hint

def get_translation_prompt(target_language, content):
     prompt = f"Translate the following into {target_language} and keep existing html tags: {content}"

     system_hint = "You are a helpful assistant that translates texts from english to german."

     return prompt, system_hint
The code defines four functions that perform tasks related to writing blog posts.
The function generate_text() uses the OpenAI GPT-3 API to generate text based on a prompt and system cues.
The function get_topic_prompt() generates a prompt for generating a topic for a blog post, while get_content_prompt() generates a prompt for actually writing the blog post with corresponding style cues.
Finally, the function get_translation_prompt() generates a prompt for translating text from English into another language while retaining existing HTML tags.
Read blacklist and create topic
blacklist_filename = "blacklist.txt"

if not os.path.isfile(blacklist_filename):
    with open(blacklist_filename, 'w') as f:
        f.write('')

with open("blacklist.txt", "r") as f:
    blacklist = f.read()

if(len(blacklist) > 0):
    prompt_topic = get_topic_prompt(blacklist=blacklist)
else:
    prompt_topic = get_topic_prompt()

topic_response = generate_text(prompt_topic[0], prompt_topic[1])

topic = topic_response.choices[0].message.content
topic_tokens = topic_response.usage.total_tokens

topic_json = json.loads(topic)
focus_keyphrase = topic_json["focus_keyphrase_english"]

if not os.path.exists(focus_keyphrase):
    os.makedirs(focus_keyphrase)

topic_filename = f"TOPIC_{topic_tokens}.json"
topic_file_path = os.path.join(focus_keyphrase, topic_filename)

with open(topic_file_path, "w") as f:
        f.write(json.dumps(topic_json, indent=4))

with open("blacklist.txt", "a") as f:
        f.writelines(focus_keyphrase + ";")
The code first checks if a file named blacklist.txt exists. If not, an empty file with that name is created. Then, the contents of the blacklist.txt file are read and stored in a variable. If the blacklist is not empty, an instruction to generate a prompt using that blacklist is generated. Otherwise, an instruction without a blacklist is generated.
Next, the generated prompt text is sent to GPT-3 using the generate_text() function, and the first generated response is used to extract the topic and focus keyword. Then, a folder with the name of the focus keyword is created, if it doesn’t already exist. A file with the generated topic is saved in JSON format in the newly created folder. Finally, the focus keyword is added to the blacklist by appending it to the end of the blacklist.txt file.
Generate the content
shortened_topic_json = {
    'focus_keyphrase_english': topic_json['focus_keyphrase_english'],
    'post_title_english': topic_json['post_title_english'],
    'meta_description_english': topic_json['meta_description_english']
}

prompt_content = get_content_prompt(json.dumps(shortened_topic_json))

content_response = generate_text(prompt_content[0], prompt_content[1])

content = content_response.choices[0].message.content
content_tokens = content_response.usage.total_tokens

content_filename = f"CONTENT_EN_{content_tokens}.txt"
content_file_path = os.path.join(focus_keyphrase, content_filename)

with open(content_file_path, "w") as f:
        f.write(content)
The following code generates content for a blog post and saves it to a text file. First, a shortened JSON object is created from the original topic, containing only the keyword phrase, post title, and meta description. Then a prompt for content generation is created using this reduced topic. The generated content is saved in a text file named CONTENT_EN_<Token Count>.txt, where the token count is derived from the response of the generated content.
Translating the generated content
prompt_translation = get_translation_prompt(target_language="german", content=content)

translation_response = generate_text(prompt_translation[0], prompt_translation[1])

translation = translation_response.choices[0].message.content
translation_tokens = translation_response.usage.total_tokens

translation_filename = f"CONTENT_DE_{translation_tokens}.txt"
translation_file_path = os.path.join(focus_keyphrase, translation_filename)

with open(translation_file_path, "w") as f:
        f.write(translation)
This code section creates a translation of the previously generated content from English to German. To do this, a text prompt is created and sent to the OpenAI service to obtain a machine translation. The result is saved in a file in the same directory as the original English version.
Creating the drafts
url = 'https://<YOUR DOMAIN>/wp-json/wp/v2/posts'
headers = {'Content-Type': 'application/json'}
auth = ('<YOUR USER>', '<YOUR PASSWORD>')

data = {
    'title': topic_json["post_title_english"],
    'content': content,
    'status': 'draft',
    'categories': '<YOUR CATEGORY ID OR LIST OF IDs>',
    'lang': 'en'
}

requests.post(url, headers=headers, auth=auth, data=json.dumps(data))

data = {
    'title': topic_json["post_title_german"],
    'content': translation,
    'status': 'draft',
    'categories': '<YOUR CATEGORY ID OR LIST OF IDs>',
    'lang': 'de'
}

requests.post(url, headers=headers, auth=auth, data=json.dumps(data))
This code section sends two POST requests to a WordPress REST API. The variable url contains the URL to the REST API. The HTTP headers to be sent in the request are defined in the variable headers, and the user’s login credentials are specified in the variable auth.
The data to be sent in the POST requests is defined in the variables data. In the first request, the English title and content of the post, the status as a draft, a category ID, and the language en are specified. In the second request, the German title and content of the post, the status as a draft, a category ID, and the language de are specified.
Conclusion
With this code, we saved a lot of work while demonstrating how to use the OpenAI API with GPT models to programmatically process ChatGPT content in a dialog-based manner.
Although we’re not quite finished with this script yet, as we still need to manually add the metadata for SEO optimization and link the translations in WordPress. In addition, the featured image still needs to be generated.
However, that’s exactly why the posts were created as drafts. This allows for fine-tuning and most importantly, the ability to review the generated content before publishing. After all, we still want to retain some control over the AI.
All in all, the OpenAI API offers a variety of use cases for automating processes with the help of artificial intelligence. With this post, we were hopefully able to show you one of many possible use cases and get you excited about the possibilities that arise from API-based access!