An AI-powered blog

Month: February 2023

My Journey to Blogging: ChatGPT as a content creator and translator

An important aspect of this blog is to use ChatGPT or other language models to assist in generating content.

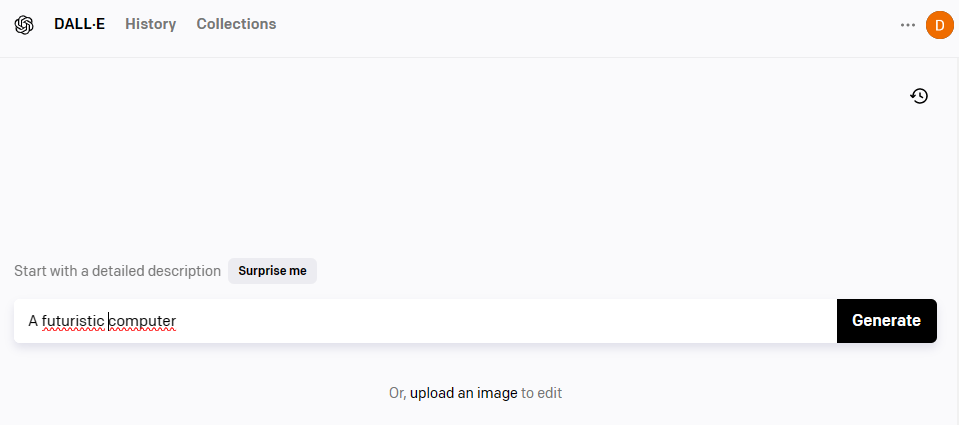
You can try it out yourself here at any time (currently free of charge) by simply registering briefly and then starting a new chat by entering your request into the prompt.

The following input was used to generate this very post here:

I would like to create a blog series titled "My Journey to Blogging". Can you write a post in a casual style about "ChatGPT as a Content Creator and Translator of Blog Posts" and mention that you can change your writing style, for example, more formal or casual? Also, please mention that you have the ability to address the user's optimization suggestions and customize your responses accordingly.

Here is the answer of ChatGPT:

No problem! As ChatGPT, I'm always happy to offer my skills as a content creator and translator to bloggers and anyone looking to improve their content.

I can help you optimize your blog posts and adjust your writing style, whether you prefer a formal or casual language. I have an extensive vocabulary and grammar that is always correct. Additionally, I can tailor my responses to your needs by addressing optimization suggestions and specific requirements from you.

For example, if you want to create a blog series titled "My Journey to Blogging", I can help you create articles that engage readers and provide value. I can also help you optimize your articles for different audiences and platforms to maximize reach and expand your audience.

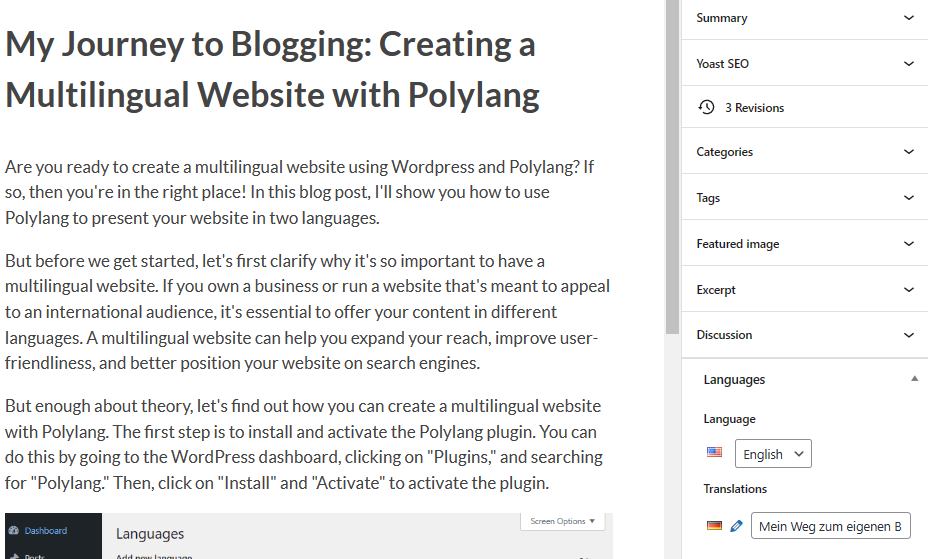
As a translator, I can translate your posts into a variety of languages to make them accessible to a wider audience. I will adapt my writing style and language to the cultural nuances of the target audience to ensure that your message is conveyed clearly and effectively.

In summary, as ChatGPT, I can help you optimize your blog posts, adjust your writing style, and translate your content into different languages. I'm always ready to address your specific requirements and needs to ensure that your content conveys exactly what you intended.

By the way, translating content or summarizing a text is also not a problem, simply ask ChatGPT for it.

My Journey to Blogging: Creating a Unique Background with DALL-E

The aesthetics and design of a blog are crucial to whether visitors stay or click away. An individual background image can help make your blog have a unique look that stands out from others.

With DALL-E, an artificial intelligence that generates images based on descriptions, you can create such a background image. In this article, we will show you how to create such an image and integrate it into WordPress.

Step 1: Go to the DALL-E website

To work with DALL-E, you first need to visit the OpenAI website, register, and click on “Try DALL-E”. This option opens a text input where you can describe how the image should look.

In the first month you have 50 attempts for free – in the following months there are still 15 attempts.

Step 2: Enter a description for your background image

Enter a description here that matches your desired background image. For example, if you want a futuristic computer screen background image like I do in this blog, you could enter “A futuristic computer”.

Step 3: Generate your image

Click on “Generate” and wait for your images to be generated. The waiting time may vary depending on the complexity of the description. Four variations are always generated, and you can choose your favorite.

Here is my favorite, but I will only use the top part for the blog:

Step 4: Download your image

Once the image has been generated, click on “Download” to download it to your computer.


If you, like me, are working with WordPress, then the following steps are also necessary:

Step 5: Upload your image to WordPress

Go to your WordPress dashboard and click on “Design” -> “Customize”. Choose “Background Image” and click on “Upload” next to “Select Background Image”. Choose the image you just downloaded and click on “Upload”.

Step 6: Set your background image

Choose “Set Background Image” and adjust the settings to your liking. You can adjust the size, position, and repetition of the image until it meets your expectations.

Conclusion

An individual background image can help make your blog stand out from the crowd. With DALL-E, it’s easy to create a unique background image and integrate it into your blog. Just follow these steps to generate your own image. Have fun creating!

My Journey to Blogging: Creating a Multilingual Website with Polylang

Are you ready to create a multilingual website using WordPress and Polylang? If so, then you’re in the right place! In this blog post, I’ll show you how to use Polylang to present your website in two languages.

But before we get started, let’s first clarify why it’s so important to have a multilingual website. If you own a business or run a website that’s meant to appeal to an international audience, it’s essential to offer your content in different languages. A multilingual website can help you expand your reach, improve user-friendliness, and better position your website on search engines.

But enough about theory, let’s find out how you can create a multilingual website with Polylang. The first step is to install and activate the Polylang plugin. You can do this by going to the WordPress dashboard, clicking on “Plugins,” and searching for “Polylang.” Then, click on “Install” and “Activate” to activate the plugin.

Once you’ve installed the Polylang plugin, you can start creating your content in different languages. The plugin offers an easy way to create and manage posts, pages, categories, tags, and custom post types in different languages. When you create a new post or page, you can simply select the desired language and create your content in that language:

Once you’ve created your content in different languages, you can use the Polylang plugin to add language switching. To do this, go to the WordPress dashboard, click on “Design,” and then on “Menus.” There, you can create a new menu or edit an existing menu. Then, add the pages or posts you want to display in both languages to the menu and create a second version in the other language for each page or post.

Next, you can add language switching by adding the “Language Switcher” element to the menu. You can then configure the settings for the language switcher, such as the available languages, language flags or symbols, and position in the menu.

And you’re done! When you visit your website now, you should see a language switcher in the menu of your website, allowing your visitors to switch between the German and English versions of your website.

As you can see, it’s really easy to create a multilingual website with Polylang. With this plugin, you can present your website in multiple languages without having to create multiple websites. Just try it out for yourself and create an even better user experience for your visitors!

My Journey to Blogging: Getting Started with Legal Requirements

As a blogger, you know how important it is to have an appealing and informative website. But have you also considered the legal requirements? As the operator of a blog site, you must ensure that you have an imprint, a privacy policy, and possibly a cookie banner to protect yourself and your readers. Here are some tips and tricks to optimize these elements on your site:

Use clear language
Both the imprint and the privacy policy should be written in clear language that is easily understandable for every reader. Avoid technical terms and legal language, and provide clear and concise information.

Ensure completeness
Your imprint should include the complete name, address, telephone number, and email address of the site operator. If you run a company, you should also provide the commercial register number or the value-added tax identification number. Your privacy policy should explain what data you collect, how you use it, and to whom you may disclose it.

Ensure that your imprint is easy to find
Your imprint should be easy to find on your website. For example, you can place it in the footer or the menu. Ensure that it is visible on every page of your website.

Use a template or an online tool
If you are unsure how to create an imprint or a privacy policy, there are many templates and online tools that can help you. Ensure that the template or tool is tailored to your specific needs and meets all legal requirements.

Regularly review your privacy policy
It is important that your privacy policy is always up to date. If the laws change or you use new tools or services on your website, you should update your privacy policy accordingly.

Cookie banner for legal compliance
If you use cookies on your website as a blogger, you should make sure to use a cookie banner. The banner appears on the first visit to your website and informs users that cookies are being used and what types of cookies are being used on the website. The user can then decide whether to consent to the use of cookies or not. The cookie banner should be designed clearly and prominently to meet legal requirements.

Here is an example imprint:

Max Mustermann
Musterstraße 1
12345 Musterstadt
E-mail: max.mustermann@example.com

Disclaimer:
The contents of this website are created with the utmost care. However, the operator assumes no liability for the accuracy, completeness, and timeliness of the provided content. The use of the website’s content is at the user’s own risk. The operator assumes no liability for external links to foreign content. Only the respective operators of the linked sites are responsible for their content. The comment function on this website is solely intended for user opinions. The operator assumes no liability for the content of the comments.

Copyright notice:
The contents of this website are subject to German copyright law. Reproduction, processing, distribution, and any form of exploitation beyond the limits of copyright law require the written consent of the author or creator. Downloads and copies of this page are permitted for private, non-commercial use only.